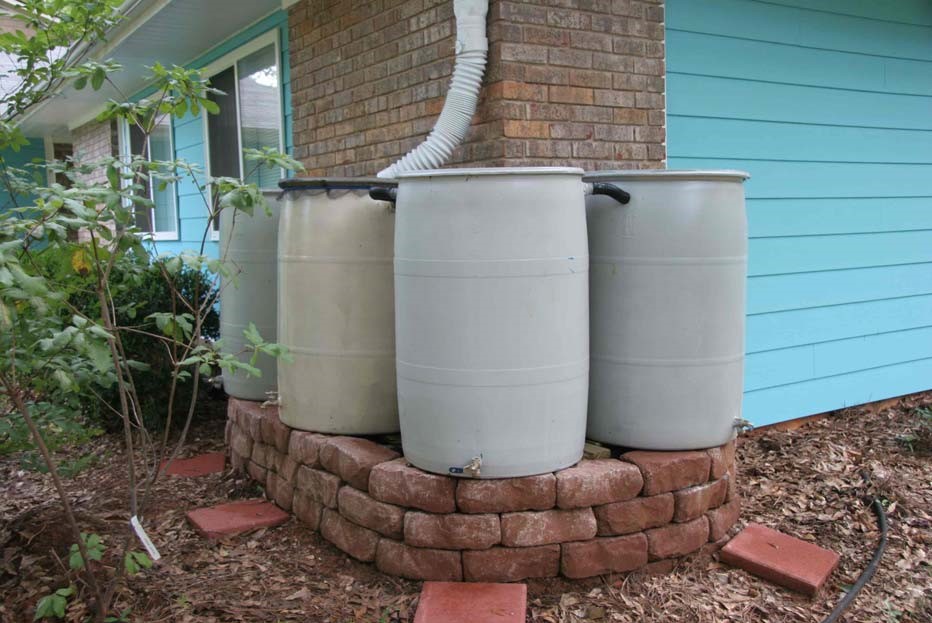
Rain barrels are a simple way to capture and recycle the rain washing off your roof. Barrel systems are an ancient technology that are making a comeback as water shortages and utility bills prompt many homeowners to save and use rain that falls on their properties.
Do you have a sustainable supply of potable water? This is an important reason you may want to build one as a prepper for emergencies. Of course, it will need purifying, but that is an easy task that can be done as simply as boiling it for a minute.
If you want to capture water naturally from your roof top for use at a later, dryer or more needful date, use a rain barrel. Large commercial plastic rain barrels are readily available at home and garden stores and online, but they are expensive. In this article we will learn to build one cheaply ourselves.
Advantages Of Rain Barrels
The biggest advantage is that rain water is softer than tap water; it has no chlorine, lime, or calcium. It has less sediment and dissolved salts and is warmer than tap water. It is excellent (some say much better) for watering plants. A secondary advantage is rain water collection barrels reduce water pollution by reducing the amount of storm water runoff.
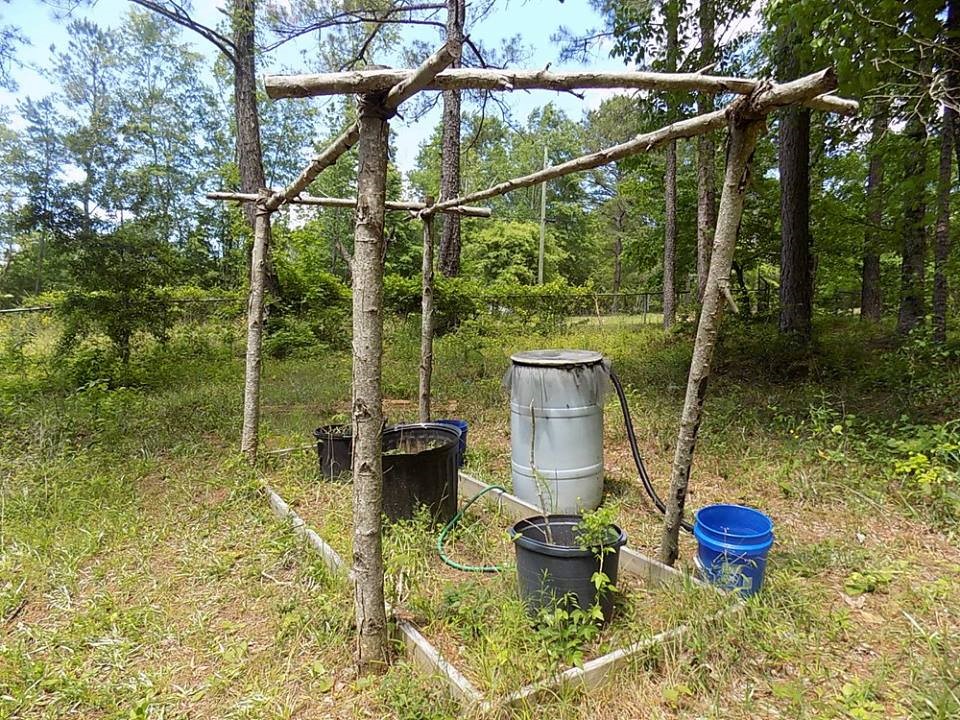
This type of collection and storage system is very efficient. A typical house has a roof area of 1,200 square feet and four downspouts that will each drain about 300-square feet of roof. That means a rainfall of 0.3 inches will fill a 55-gallon rain barrel placed under each downspout. A roof with 1,000 square surface feet captures 625 gallons of water for every one inch of rain that falls. Doesn’t that sound to you like an awful lot of water that you could harvest and use for free on your garden?
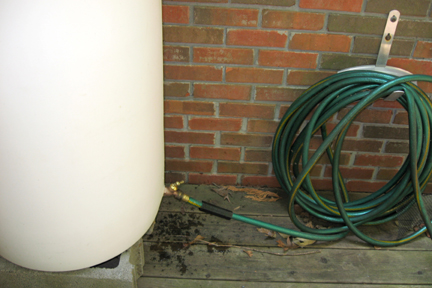
Photo courtesy of Alabama Extension
Ways To Recycle Collected Rainwater
- Fill watering cans
- Water gardens or lawns
- Connect a soaker hose to automatically empty the barrel into your garden
- Wash cars/pets
To empty the barrel when full use two barrels. Keep one full for watering needs, and one empty ready to catch the next rain. If you don’t have a roof to use for rainwater barrel attachment, you can build a rain catchment system with some plastic sheeting or a military poncho.
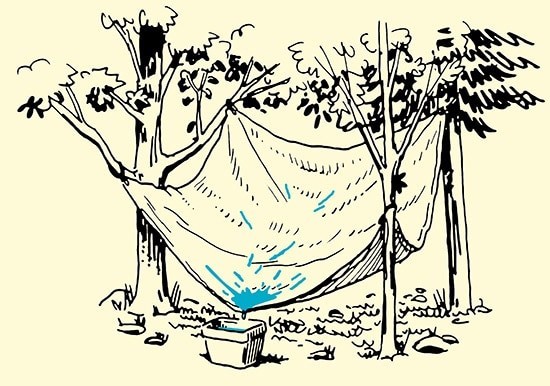
Photo courtesy of U.S. Army
This water barrel that I have far from my house can be filled manually or with a water catchment system to fill my container garden.
Creating A Rainwater Collecting And Storage System Is Simple
For best results, try to attend a workshop put on by your county extension service. They usually do these in spring to help generate local enthusiasm for the many benefits of rain harvesting.
Choose and purchase a barrel that has at least a 42-gallon capacity. Rain barrels typically tie into your home guttering system. There are many rain barrel designs, both commercial and creative DIY styles.
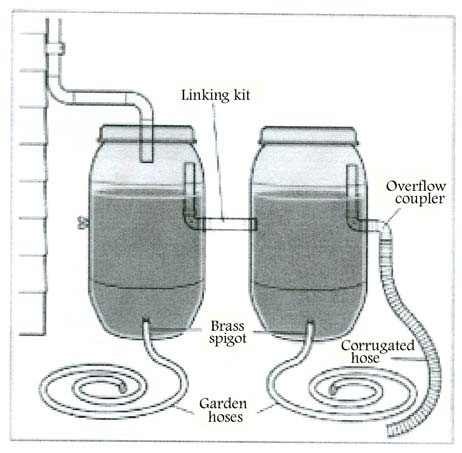
No matter the design, they all have three basic things in common:
- Incoming
- Outgoing
- Overflow features.
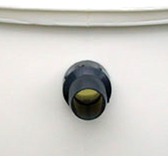
There is an opening for water coming into the barrel and two more openings for water going out. A spigot inserted near the bottom allows you to fill a watering can or connect a hose. An overflow is needed near the top to remove excess water during heavy rain events.
Now there are a lot of ways to use the water your rain barrel collects and move it to where you want to use it. My favorite way is to allow water to travel from a water barrel cistern through a soaker hose that snakes through the garden that will disperse stored water throughout the garden over a prolonged period of time.
A 55-gallon rain barrel with a soaker hose takes about 12 hours to drain. A spigot in the middle of the barrel can be used to fill a watering can through a hose. You can get water on demand by either gravity feed or you can add pump action. I added a cheap solar fountain pump to mine to pump water out to the garden soaker hose. Adding a happy grandkid helper is another more labor intensive but fun way to get water to whatever needs to be watered.

Making a Rain Barrel
If you have gutters on your house, you may be able to collect 55 gallons of water during a heavy rain by connecting a downspout to a rain barrel. Note that during a heavy rainfall there is the potential to fill many more barrels, take advantage of it. Bulk type foodstuffs like pickles, olives etc. often are packaged in FDA food grade barrels which can work well for our purpose.
If you are recycling a used container you for your project you need to make certain that you clean it thoroughly. Do not ever use a container that held caustic or poisonous materials. Large plastic type trash cans will also work well, just use your imagination.
How To Make A Rainwater Barrel Collection System
Supplies
- Plastic barrel – 55-gallon are the most common
- ¾ inch spigot (hose bibb) with male threads
- PVC cement or Teflon tape
- 1 ¼ inch sump hose – 8 foot or longer
- 3-foot x 3-foot fiberglass screen wire
- Bungee cord
- Flexible downspout elbow
Tools
- Drill – electric hand drill will work
- Spade bits or hole saws: 1-inch and 1 3/8 inches
- Reciprocating or jigsaw – electric hand saw will work
- Adjustable pliers
Directions
- Rinse the barrel out well.
- Incoming – Use the reciprocating or jigsaw to cut out the top leaving the thick rim for support. The entire top will become a collection point for rain water.
- Outgoing – Lay the barrel on its side and drill a 1-inch hole near the barrel bottom, above the point where the barrel side is curved. Be careful to hold the drill straight to get a good, round hole. Brace the barrel firmly to assist this step.
- Carefully turn the male threaded faucet into the barrel, threading it into the plastic. Use the pliers, if necessary. Keep it straight for a good fit. Then back the faucet out, preserving the threading.
- Apply Teflon tape or PVC cement to the faucet threads and screw it back into the barrel. The faucet should fit flush with the barrel surface and point downward.
- Overflow – Drill a 1 3/8” hole near the top of the barrel. If you know where the barrel will be installed, think of the best side for the overflow hole to be located. If you don’t know, just put the hole above the faucet. Again, drill the hole carefully to keep it round.
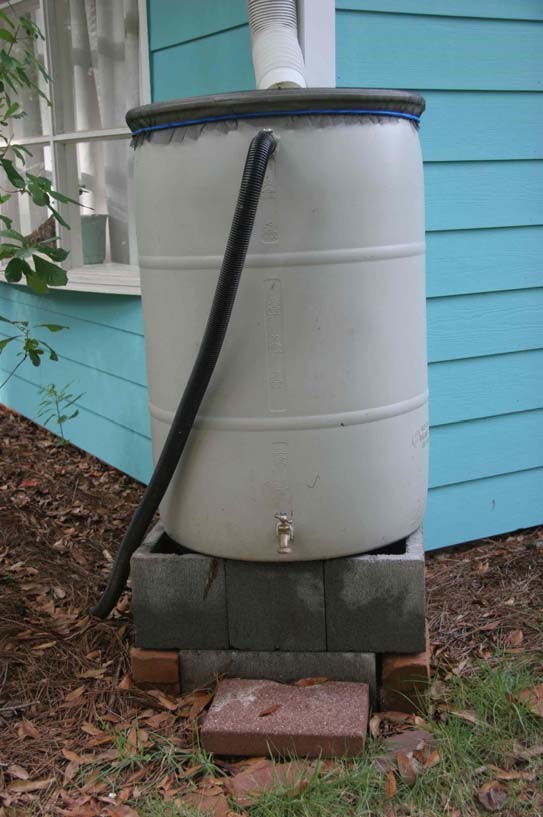
- Installing the Rain Barrel – The barrel should be raised above the ground to allow room to connect a garden hose to the faucet or to place a watering can underneath it. Three or four concrete blocks (one or two layers) underneath the barrel work well.
8. Place the 3-foot x 3-foot screen over the barrel top and use the bungee cord to keep it tightly in place. Smooth the screen and trim with scissors, if you like. The rain barrels should be capped with fiberglass screen that allows water in, but keeps mosquitoes from getting into the barrel to lay their eggs. However, if you are concerned about mosquitoes breeding in your rain barrel, you can add half a Mosquito Dunk to the water in your barrel to kill mosquito larvae. Mosquito Dunks can be purchased at most garden supply stores.
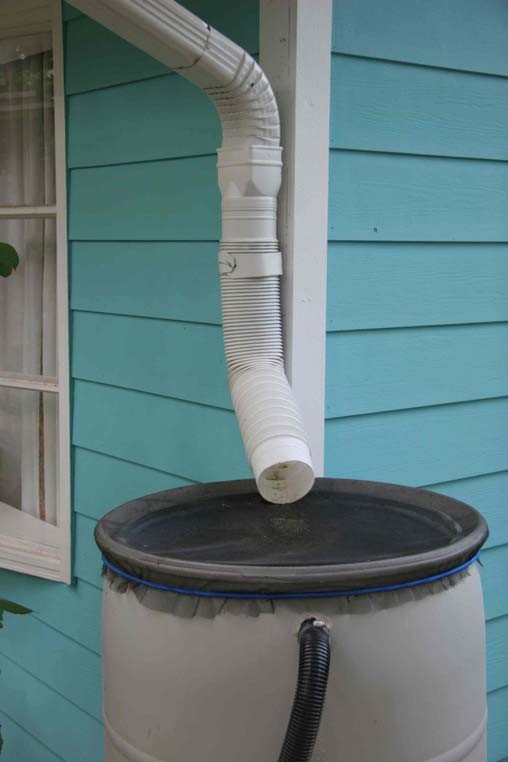
9. If your site has a gutter downspout, remove the lower part of the down spout and attach a flexible, plastic downspout to it. Direct the flexible spout to lay on the barrel screening.
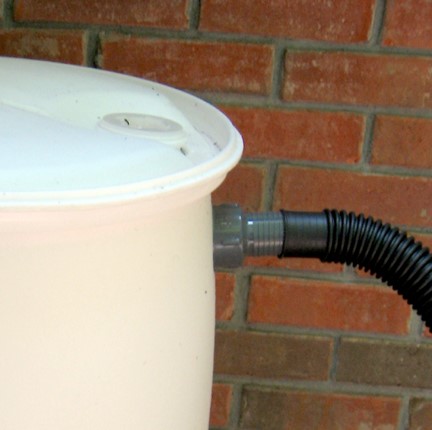
10. Using a sump hose for the overflow has several advantages. It is long enough to direct water where you want it; its flexibility aids in directing water; it can be easily perforated; and it is inexpensive. Insert the sump hose into the overflow hole near the top of the barrel. Lay out the hose to direct the overflow water to a safe location (lawn, flower bed, rain garden, etc.). Punching holes into the hose will let water soak into the soil over a larger area or insert the hose end into another perforated hose or pipe to direct water to planted areas nearby.
11.This open top design is very forgiving during excessively heavy rain events. However, to enhance the irrigation potential of your overflow, add a second overflow hose. Increase water storage by connecting several rain barrels using a 2-inch PVC connector.
Helpful Rain Barrel Hints
- Barrels either have sealed lids or lids that can be removed. Those with sealed lids typically have two small round threaded openings. These can be used to clean out the barrel or to attach PVC fittings for incoming/outgoing water.
- Barrels with flat bottoms are more stable.
- Barrels made of white plastic seem to disintegrate more quickly in the sun if not painted – the darker the color the less algal growth also. When painting your barrel use a paint that is suitable for plastic surfaces.
- Make sure the overflow directs water away from the foundation of your house.
Controlling Mosquitos and Algae
Rain barrels are great for hand watering, and they are not mosquito breeding grounds if the downspout fits tightly. If your barrel is open at the top, use Bacillus thuringiensis (Bt) products (often sold as a floating donut) to kill mosquito larvae in a safe way.

If you happen to have algae take root in your rain barrel, treat the water with submersible bacterial packets sold in pond supply stores. A rain barrel is not unsightly; however, a four foot shrub can easily shield it from view if needed.
Rain Chains
Rain Chains are a beautiful and functional alternative to traditional downspouts. They guide rainwater from the roof to the ground, and are typically handcrafted of copper that will gain a verdigris patina color as it ages – much less expensive material can also be used. They produce soothing sounds as they guide rainwater from the rooftop to the ground. Rain Chains replace the traditional downspout on a typical household gutter system.
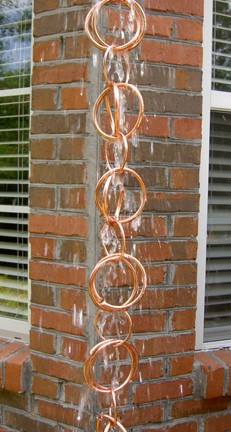
Rain Chains, otherwise known as “kusari doi” in Japanese, are not a new idea. For hundreds of years, the Japanese have used the roofs of their homes to collect water, using chains to transport it into large barrels for household water usage. Rain Chains are easy to install by making a copper hook to rest in the gutter hole. The Rain Chain is hung from the hook.
You can easily purchase commercial rain chains, but let’s look at how we can make our own.
How To Build a Rain Chain
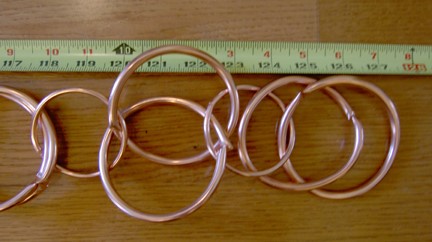
- For an 8 to 9-inch rain chain, you will need about 40 feet of ¼ inch soft metal tubing for large rings and 15 feet for small rings. Cut the tubing with pruning shears or wire cutters, working the pieces back and forth until they separate. Save one foot of the tubing to be used later.
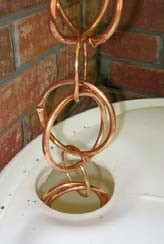
- Link the large rings together, and join each pair of large rings with a small ring using a pair of pliers.
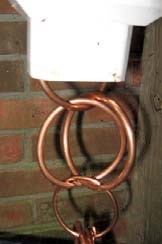
- Remove your downspout. Shape the 1-inch piece of tubing, and then place it in the gap as shown. Secure the chain to the tubing using the top ring.
- Place a container (such as a rain barrel or large earthenware jar) underneath the chain to catch rainwater, and use the collected water to irrigate your garden.
Hints to Customize Your Rain Chain:
- You will need roughly 3.5 times as long a piece of metal tubing – as you would like your finished chain. The tubing can be found in the plumbing department of home improvement stores.
- Large rings are about 3 inches and small rings are roughly 1-inch diameter.
- To create the large rings, wrap the tubing around a 3-inch piece of PVC (or similar sized tube); to create small rings, wrap the tubing around a 1 to 2-inch piece of PVC – or similar sized tube.
Conclusion
Given the uncertainty of droughts and your garden, or municipal water plants failing in a grid down situation, it just makes good sense to build yourself a rain barrel to save some of that free water for possible dry days ahead.
A rain barrel is useless when there is no rain—or is it? Fill it up just like your bathtub with water if you get warning of a impending disaster. Bucket brigade filling from a creek or nearby water source is also effective to have water readily available for your garden or household.
Technically, a rain barrel acts as a small cistern – a reservoir or tank for holding rainwater for later use. Regardless of impending drought conditions, saving rainwater can make sense for any gardener. Plants like rainwater, which is naturally soft and chemical-free to help them grow.