Knowing how to tie “real” or traditional knots is an extremely useful survival, as well as everyday skill that all people should know. Knots come in all types and forms, many of which have been developed over the centuries to perform a specific task like moving large logs or tying up a boat. Basic knots to most inexperienced campers or laypeople, are often taken for granted but this skill set should not be overlooked by survival enthusiasts.
A skillfully tied knot can literally save your life. An improperly tied knot can spell disaster like when your tarp comes loose in a thunderstorm or that gear you tied on your roof comes loose as your driving down the road. If you don’t use the right knot, you risk having your line or rope come undone, or having to cut your line or rope because the knot won’t come loose. Most traditional knots basically share two attributes, they are strong and easy to get undone.
The Bowline Knot
The number one knot that comes to my mind when thinking about survival is the bowline. This is considered by many to be the “King” of all knots and gets its name from its was traditional use by sailors to affix the sail to the bow (front) of the boat.
The Bowline creates a loop at the end of a rope that cannot slip. This is a very important attribute to this knot, particularly when it is used to lower or raise up a person with a rope around their body. This is the one knot that you should learn to tie one handed and be able to perform the task with either hand.
Why is this you might ask? Suppose for instance you fell over a cliff or down a well and broke your arm. Being able to tie this knot one-handed will allow you to overcome your disability and assist your rescuer trying to hoist you up after lowering a rope to your perilous position.
The bowline knot will keep you from getting your innards squished on the way up by not loosening when all your weight is suspended from its loop. The virtues of this knot are that it is both easy to tie and untie; most notably, it is easy to untie even after being subjected to a heavy load.
How To Tie A Basic Bowline Knot
- Make an initial loop near the end of the rope
- Pass the longer end of the rope up through the loop
- Pass the end around the start of the rope from right to left
- Pass the end down into the new loop and tighten
Bowline Knot Tip
The Boy Scouts have a mnemonic to remember how to tie this knot, “The rabbit comes out of the hole, around the tree, and back in the hole.”
The loop is the rabbit’s hole, one end of the rope is the rabbit, and the opposite end of the rope (where the knot begins) is the tree the rabbit goes around.
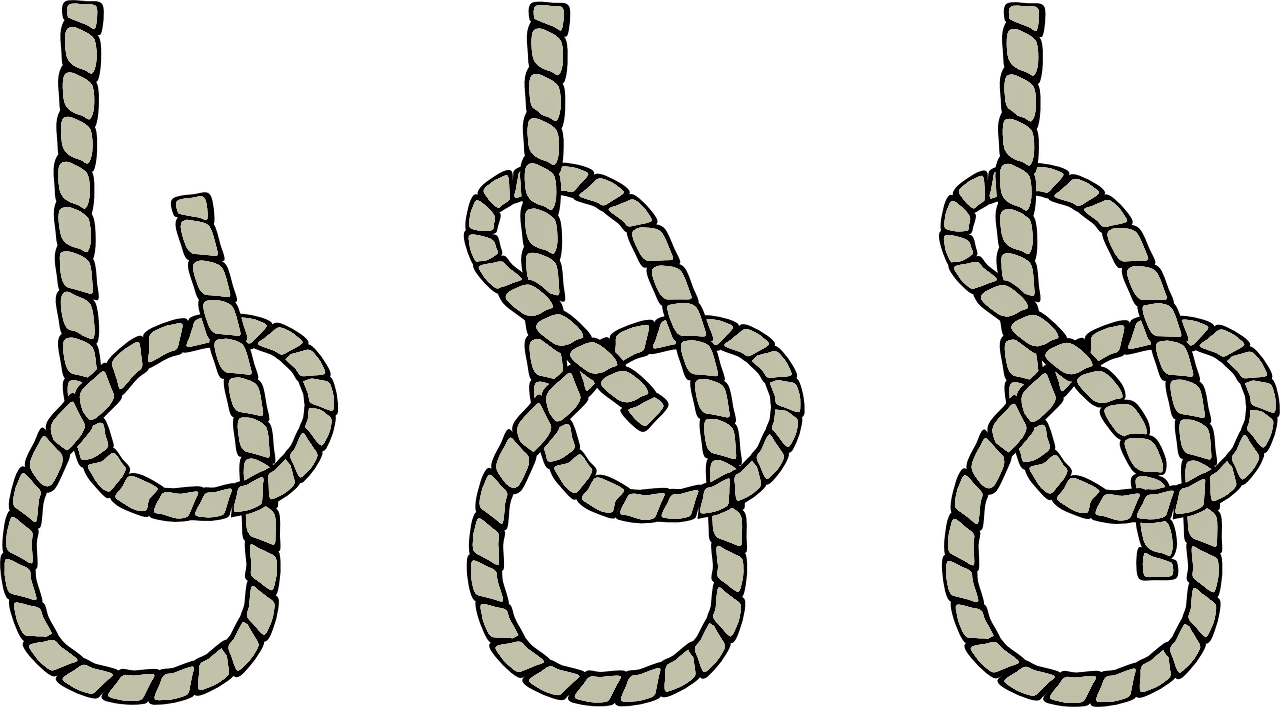
Photo courtesy of Pixabay
Uses For The Bowline Knot
- Making a loop at the end of a rope
- An all-purpose camping knot.
- Linking together two ends of a rope
- Hanging your food up in a tree to keep it away from predators
- The Federal Aviation Administration recommends the bowline knot for tying down light aircraft
- Attaching a rope to a tree for climbing
- Securing a trap
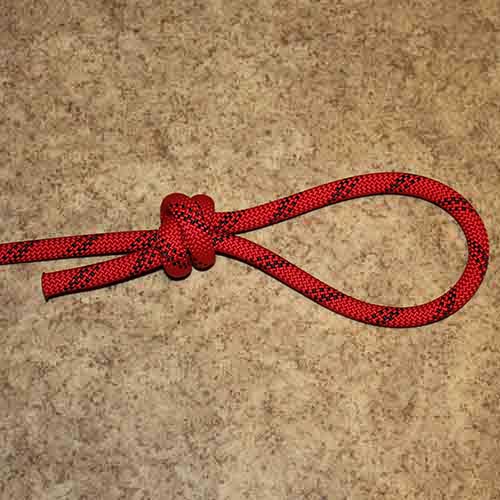
The Poacher’s Knot
The Poacher’s is also known as a Strangle Snare and a Double Overhand Noose – because the knot tied round the standing end is known as a Strangle Knot It is also called a Two-Turn Scaffold Knot.
The poacher’s knot is used to tie a loop in the end of a piece of rope. The loop will constrict during loading. One useful application of the poacher’s knot is paracord animal snares. It works well for this purpose because it offers high security even when tied with slippery synthetic cordage.
The poacher’s knot can be really hard (or impossible) to untie after it has been loaded so you don’t want to lift heavy weights with it.
Basic Square Knot
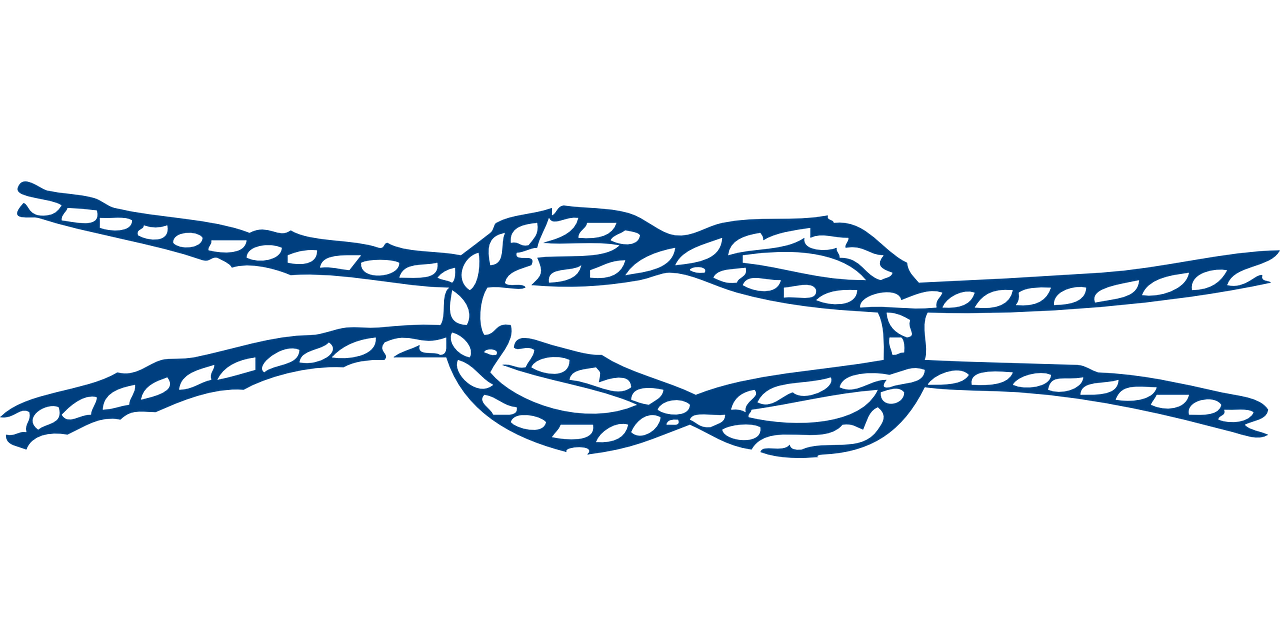
Photo courtesy of PixaBay
A square knot is composed of two overhand knots turned in opposite ways. It flattens when pulled tight, making it useful in first aid and for tying packages. Because the knot lies flat when made with cloth and has been used for tying bandages for millennia. The square knot can be used to tie the ends of two ropes of equal diameter. It is a joining knot.
Tying a square knot is as easy as right over left, left over right. Here’s how:
- Hold an end of the rope in each hand.
- Pass the right end over and under the rope in your left hand.
- Pass the rope end now in your left hand over and under the one now in your right.
- Tighten the knot by pulling both running ends at the same time.
Photo courtesy of Army Field Manual 3-97.61
Square Knot Tip
A common mnemonic for this procedure is “right over left; left over right”, which is often appended with the rhyming suffix “… makes a knot both tidy and tight.”
The term bend is generally applied to knots that connect two ropes or that connect one rope with a solid object. The sheet bend, or weaver’s knot, is one of the most useful of these. Weavers tie ends of thread together with this knot because it passes smoothly through the needle. The sheet bend is begun like the square knot, but one of the ends is then turned back under itself.
The Sheet Bend Knot
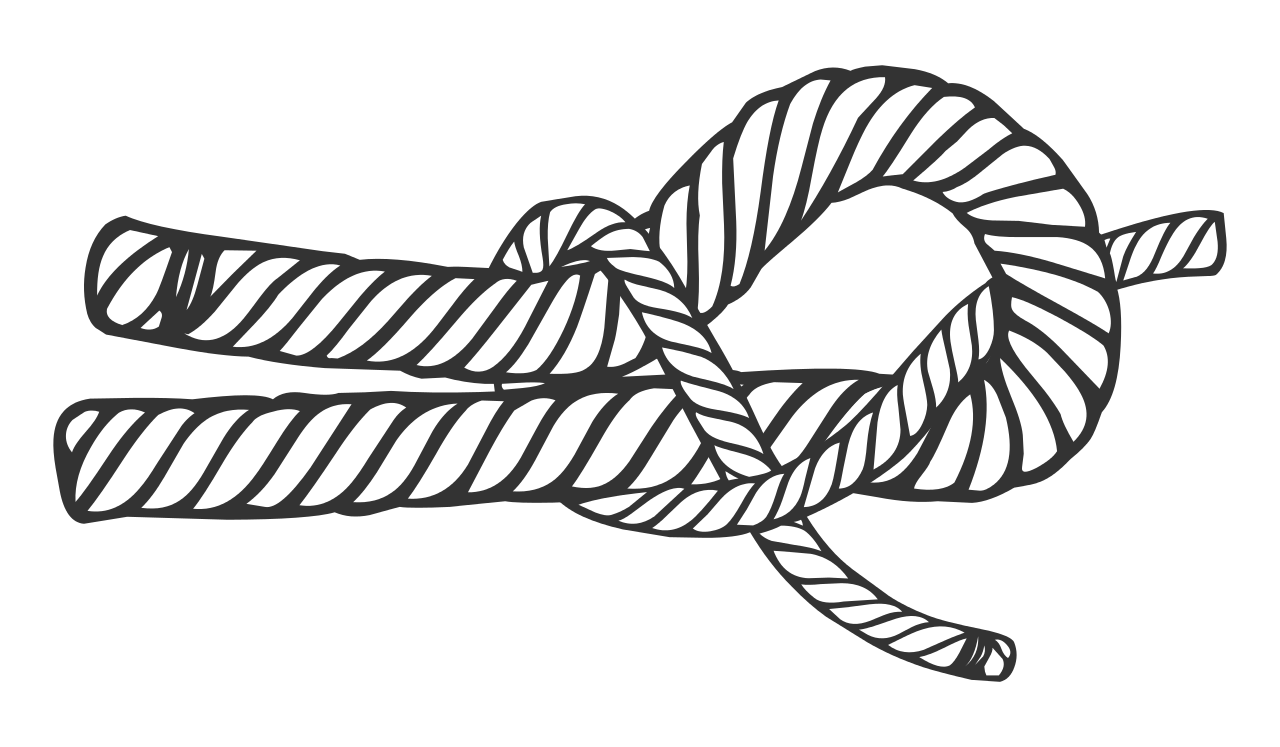
Photo courtesy of The Bodgery Wiki
The term bend is generally applied to knots that connect two ropes or that connect one rope with a solid object. The sheet bend, or weaver’s knot, is one of the most useful of these. Need to attach a piece of paracord to a rope? This not is what you need! This knot is recommended for joining ropes of different diameters, but it is equally effective for ropes of equal thicknesses as well The sheet bend is begun like the square knot, but one of the ends is then turned back under itself.
A double sheet knot bend is a variation that is good to know also. This knot is used to tie together the ends of two ropes of equal or unequal diameter.
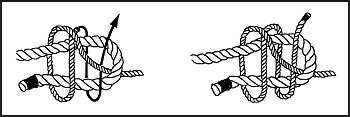
Photo courtesy of U.S Army Field Manual 3-05.70
It will also join wet rope and not slip or draw tight under load. It can be used to tie the ends of several ropes to the end of one rope. When a single rope is tied to multiple ropes, the bight is formed with the multiple of ropes.
Taut Line Hitch Knot
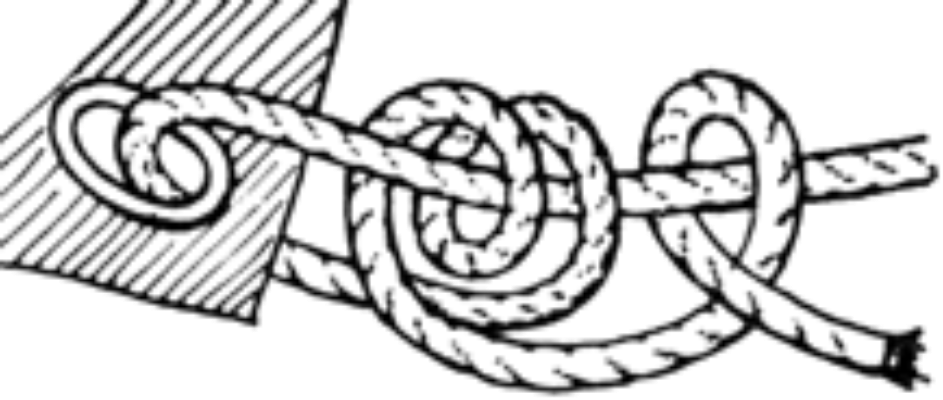
Photo courtesy of Meritbadge.org
This is a nautical knot that has been used by the Boy Scouts of America since 1910. The taut line hitch is a movable knot that can be adjusted up or down a length of rope. You will find yourself using this camping knot to attach the guy line of your tents to pegs, tarp corners or for anchoring a boat to shore.
To create an adjustable loop that stays in place, use the taut line hitch. This one takes a bit of practice to get right.
How To Tie A Taut Line Hitch Knot
- Cross the end of the rope around the pole, and over the top of the remaining rope to create a “Q” shape. Making sure your Q has a really long tail.
- Bring the tail of the Q up through the loop from behind.
- Pass the tail through the loop a second time.
- Pull the end down parallel alongside the remaining rope.
- Make another Q underneath the knot, below the larger Q.
- Pass the end through the front of the lower loop.
- Now pull the end tight, and play with the sliding effects of this knot.
Conclusion
Knowing just a few key knots can help make survival much easier so get your paracord or rope out and practice, practice, practice like your life depends on it – because one day it just might.
Feature Photo courtesy of Wikimedia Commons

_2_Swift.jpg)